
Following on from the last post in this impromptu mini-series, working with some address lookups and determining which relative geospatial boundary they are within. All based on my recent side-quest into learning about the telecoms licensing in India. This post takes it to the obvious next level by migrating the code to an Azure Function, and creating a Custom Connector so that it can be used in Power Automate by any low-code / no-code flow.
Setting Up
Like all of this these days, standing on the shoulder of giants, the process couldn't really be any easier.
Firstly install the 'azure-functions-core-tools' npm package. This gives you everything you need to develop Azure Functions locally.
npm install -g azure-functions-core-tools@4 --unsafe-perm true
func --version

.. outputs the raw version number on it's own like this,
.. 4.0.6821
Then setup a local TypeScript project with all the necessary files and baseline configuration. There's even a template for "HTTP trigger" as well as Azure Cosmos DB trigger, Blob storage trigger, Queue storage trigger, and a timer trigger.
func init geocodeIndia --typescript
cd geocodeIndia
func new --name geocodeFromAddress --template "HTTP trigger" --authlevel "anonymous"
Anonymous!!, yeah I know.. I'll figure out the auth stuff later, how hard can it be, right? #watchthisspace
Migrating My Code
A couple of high-level structural changes and additions such as including the relevant bits from @azure/functions.
import { app, HttpRequest, HttpResponseInit, InvocationContext, output} from "@azure/functions";Set up an interface that defines the object I'll be returning if this is all successful.
interface apiResult {
    address: string;
    formattedAddress: string | null;
    lat: number | null;
    lng: number | null;
    stateName: string | null;
    districtName: string | null;
    serviceArea: string | null;
    result: string;
}
Entry Point
This is the main entry point for the Azure Function.
export async function ENDPOINT_NAME(request: HttpRequest, context: InvocationContext): Promise<HttpResponseInit> {
  ... code here ...
}
Then it's just a case of validating that the expected parameters have been passed, in this case all I'm expecting is a simple JSON payload with 'address' property.
{
  "address": "address string here"
}
So if that checks out, we can more or less get back to the code I had from the previous article that uses Google Maps API to get the latitude and longitude, and then use Turf.js to determine if that is within the polygon boundary data I have in GeoJSON format.
Testing Locally
There's nothing particularly complex about what I'm doing here, so the npm run build really just runs tsc and that's it. Then npm start runs func start.
npm run build
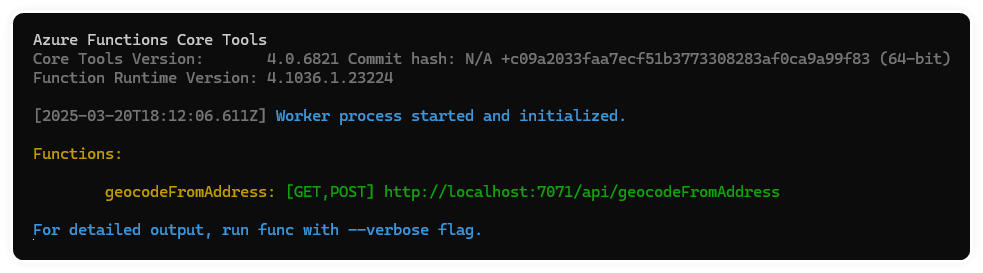
npm startIf all is good, then the output you'll see should be something like this, and the Azure Function is running locally in all its glory!
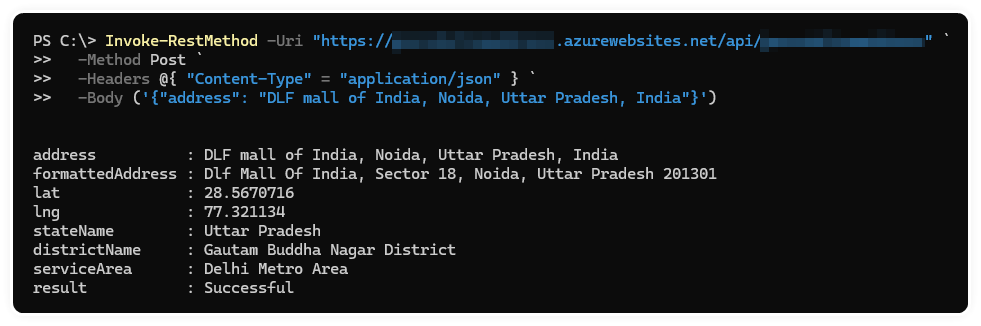
From a separate window, I used PowerShell Invoke-RestMethod to call my function. All that's needed is the URI (from the output above), Method should be POST because we're passing JSON in the body of the HTTP Request, and then Content-Type header to state we'll be passing application/json data in the body. And then the body itself.

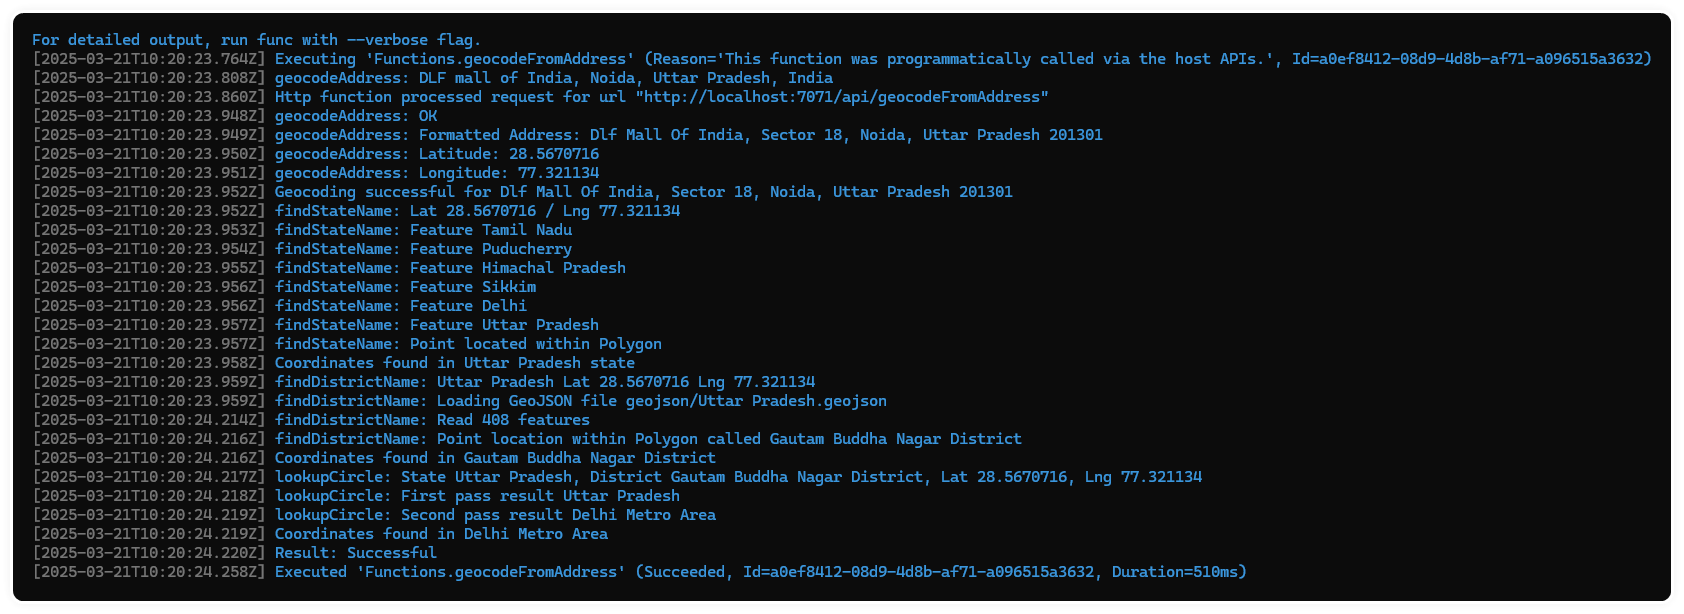
Then back over in the Azure Function window, you can see my messy console.log() output along with some output from 'func' before and after my code is executed.
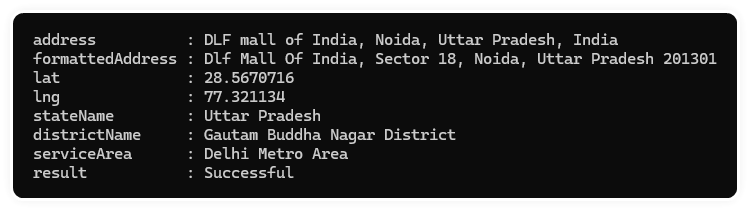
And just like that, here's the output of the Invoke-RestMethod. Niice.
Azure Function Setup
To do this I'll install and use Azure CLI. And checking it's all good by running...
az version

.. outputs something like this,
.. {
..   "azure-cli": "2.70.0",
..   "azure-cli-core": "2.70.0",
..   "azure-cli-telemetry": "1.1.0",
..   "extensions": {}
.. }
Setting up my credentials, by running az login and following the prompts and popups for my Entra ID details.
Once authenticated, it will prompt you to select a subscription to use by default, each will have a number, just type the one you want to use.
I'm creating a new resource group to put this in, but you can obviously use an existing one too.
az group create --name GROUP_NAME --location EastUS{
"id": "/subscriptions/GUID/resourceGroups/GROUP_NAME",
"location": "eastus",
"managedBy": null,
"name": "GROUP_NAME",
"properties": {
"provisioningState": "Succeeded"
},
"tags": null,
"type": "Microsoft.Resources/resourceGroups"
}Also, a storage account is required for Azure Function for hosting the code, configuration, and any other files, logs, metadata that's created or used. After running this you'll get another JSON dump of the results.
az storage account create --name STORAGE_NAME --location EastUS --resource-group GROUP_NAME --sku Standard_LRSNow let's create the Azure Function itself
az functionapp create --resource-group GROUP_NAME --consumption-plan-location EastUS --runtime node --functions-version 4 --name FUNCTION_NAME --storage-account STORAGE_NAMEAmongst the lengthy results that are dumped on your screen here's an example of the more meaningful bits if you're interested.
{
  ...
  ...
  "defaultHostName": "YOUR_FUNCTION_NAME.azurewebsites.net",
  "enabled": true,
  "enabledHostNames": [
    "YOUR_FUNCION_NAME.azurewebsites.net",
    "YOUR_FUNCION_NAME.scm.azurewebsites.net"
  ],
  "hostNames": [
    "YOUR_FUNCION_NAME.azurewebsites.net"
  ],
  "id": "/subscriptions/GUID/resourceGroups/GROUP_NAME/providers/Microsoft.Web/sites/FUNCTION_NAEM",
  "location": "EastUS",
  "name": "YOUR_FUNCTION_NAME",
  "outboundIpAddresses": "AZURE IP ADDRESSES",
  "possibleOutboundIpAddresses": "MORE AZURE IP ADDRESSES",
  ...
  ...
}
Publishing my Azure Function

Let's do this! Running the following will publish the local content up to the newly created Azure Function. Remember to run npm run build before this to ensure the latest version of your code has been compiled and is ready to go.
func azure functionapp publish geocodeFromAddressOnly takes a few seconds, I've got approximately 350Mb of GeoJSON data which zips up quite well as you can see below.
Setting Functions site property 'netFrameworkVersion' to 'v8.0'
Getting site publishing info...
[2025-03-20T18:42:43.710Z] Starting the function app deployment...
Creating archive for current directory...
Uploading 48.34 MB [##############################################################################]
Upload completed successfully.
Deployment completed successfully.
[2025-03-20T18:43:58.319Z] Syncing triggers...
[2025-03-20T18:44:02.159Z] Syncing triggers...
Functions in YOUR_AZURE_FUNCTION:
    YOUR_FUNCTION_NAME - [httpTrigger]
        Invoke url: https://YOUR_FUNCTION_NAME.azurewebsites.net/api/ENDPOINT_NAME
Testing is as simple as re-running the PowerShell Invoke-RestMethod used above, but with the new URL from the output you just got.
Another way to test would be calling it from Power Automate using the HTTP action. To get this to be a slightly more 'real-worldly' test, I created a dataverse table with primary column for the original address, along with columns for the other data that will be returned from this Azure Function. Ultimately it would be some sort of customisation on or relationship with various address-related tables across Dynamics 365.
I could have stopped there, but that's not very user-friendly for the rest of the team that work with Power Automate.
Let's do it properly.
Custom Connector
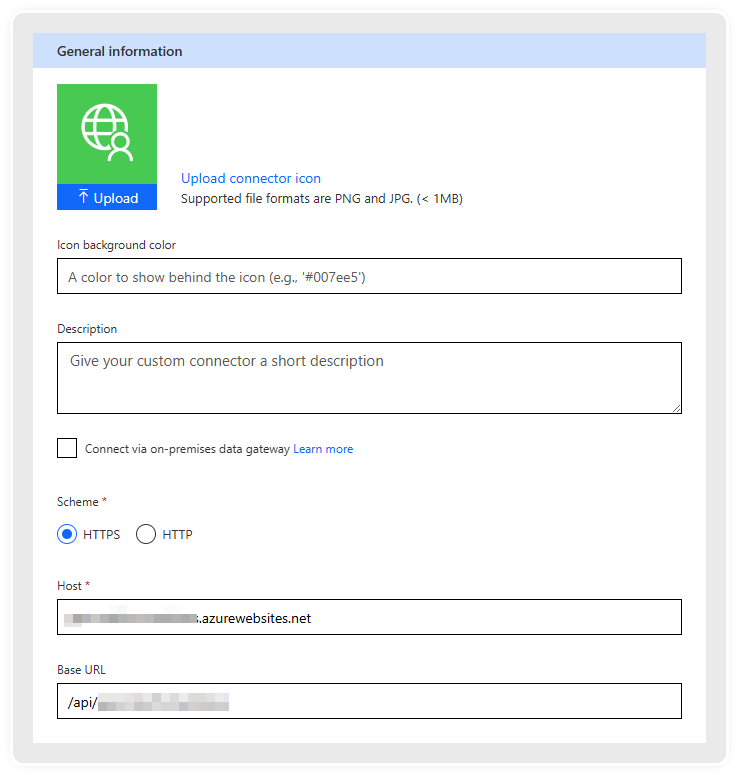
A custom connector is a Power Platform connector that you create within your organisation. Essentially it's a wrapper for your API (i.e., Azure Function, or any other REST endpoint) that defines a bunch of metadata and structure along with the most important aspects, an icon and background colour.
In Power Apps or Power Automate portals, go to Data on the left menu (you might have to click Discover and then find the Data section, and in that will be Custom Connectors.
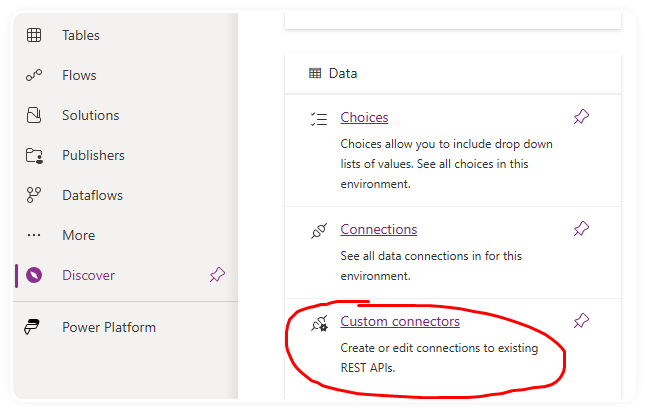
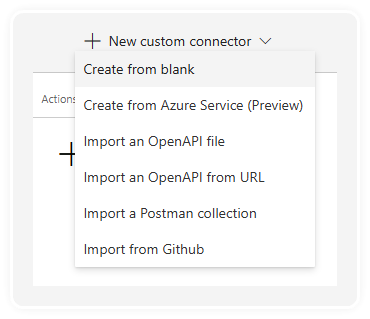
Then click on the 'New custom connector' drop down at the top right, and choose Create from blank.
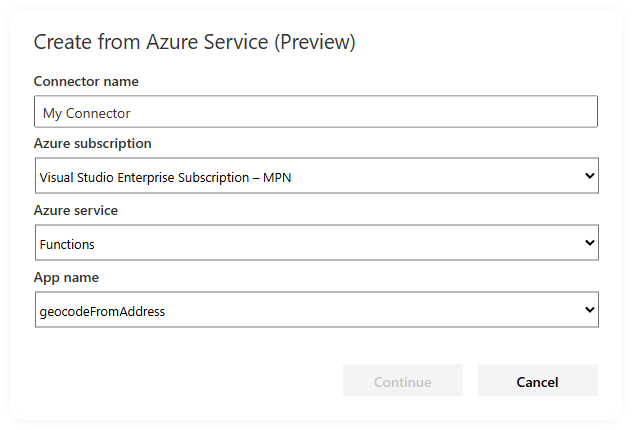
Create from Azure Service (Preview)
I did try using the Create from Azure Service (Preview) option, and filled out the details, all the dropdowns populate correctly and I can see my Azure Function, but the Continue button stays disabled, so I've obviously not completed some pre-req steps for that approach to work.
Oh well, on with the show...
Create from blank
There are 6 steps to get through, but they really don't take long at all...
- General: Icon, background colour, description etc.
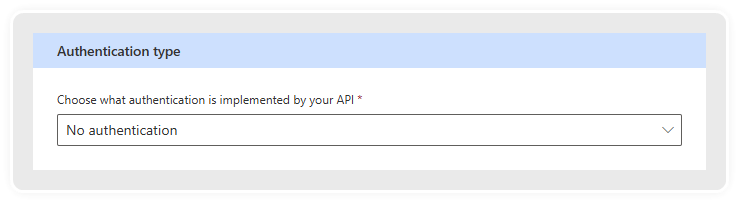
- Security: Select the authentication type to use
- Definition: this is where the request and response schemas are added and customised with human-friendly Titles, and Descriptions etc.
- AI Plugin (preview): this is only required if you'll be using this Custom Connector from a Copilot bot.
- Code: optionally add or upload code that performs additional transformation of the request or response payloads
- Test: Create a connection, and send some data through the custom connector.
General
Security
Select Authentication type, like I said above, let's worry about this later, what's the worst that can happen...
Definition
I don't have a trigger for this Custom Connector, so I'll just add an Action here, which needs me to further define things like description, Operation ID, as well as the request and response schemas.
Request Configuration
It's probably easiest to use the Import from sample feature, where you can paste in sample payloads.

Quick note, the Headers section is just for custom headers that can be passed from Power Automate, you don't need to specify the content type here unless you expect people using the connector to provide their content type also.
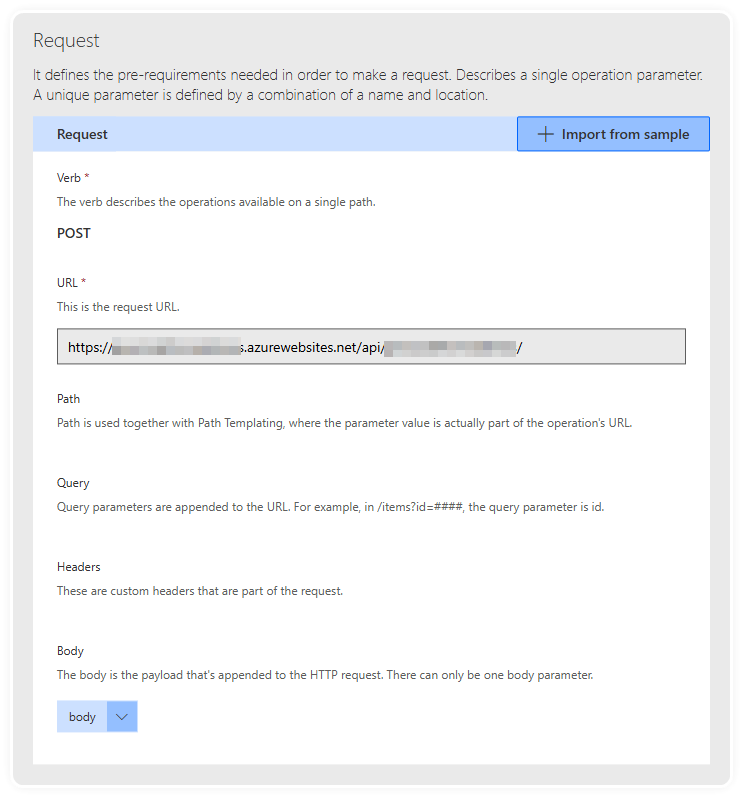
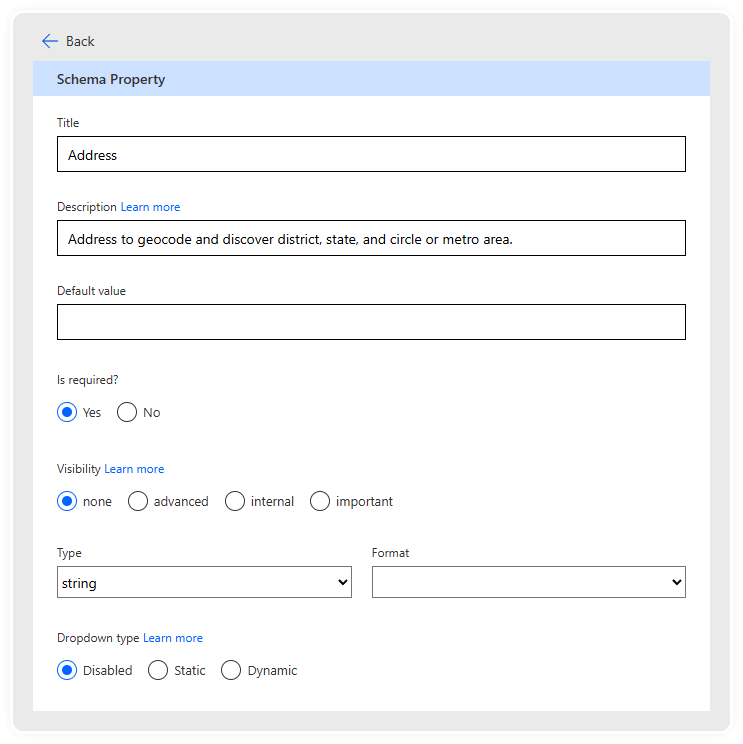
You can then go in and Edit the body by clicking the down arrow next to the tag, and then go in again and edit the Address property from the Body to give it a title, description, and confirm the data types.
Response Configuration
Do the same with the Response section, paste in an example payload, and then go through each of the properties to give a title and description etc.
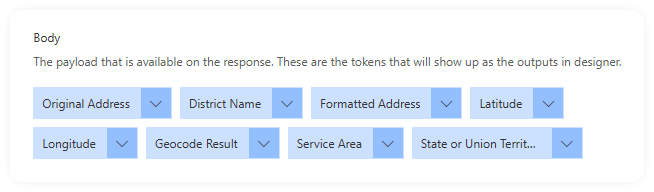
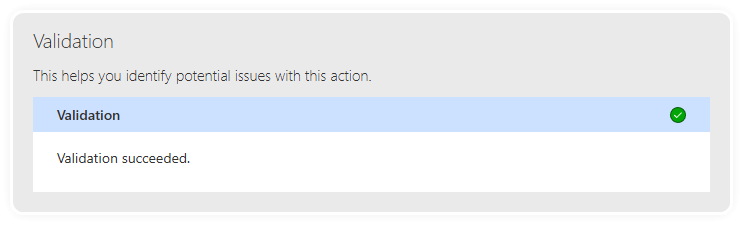
Then just check the validation section at the bottom to see if you're all set.
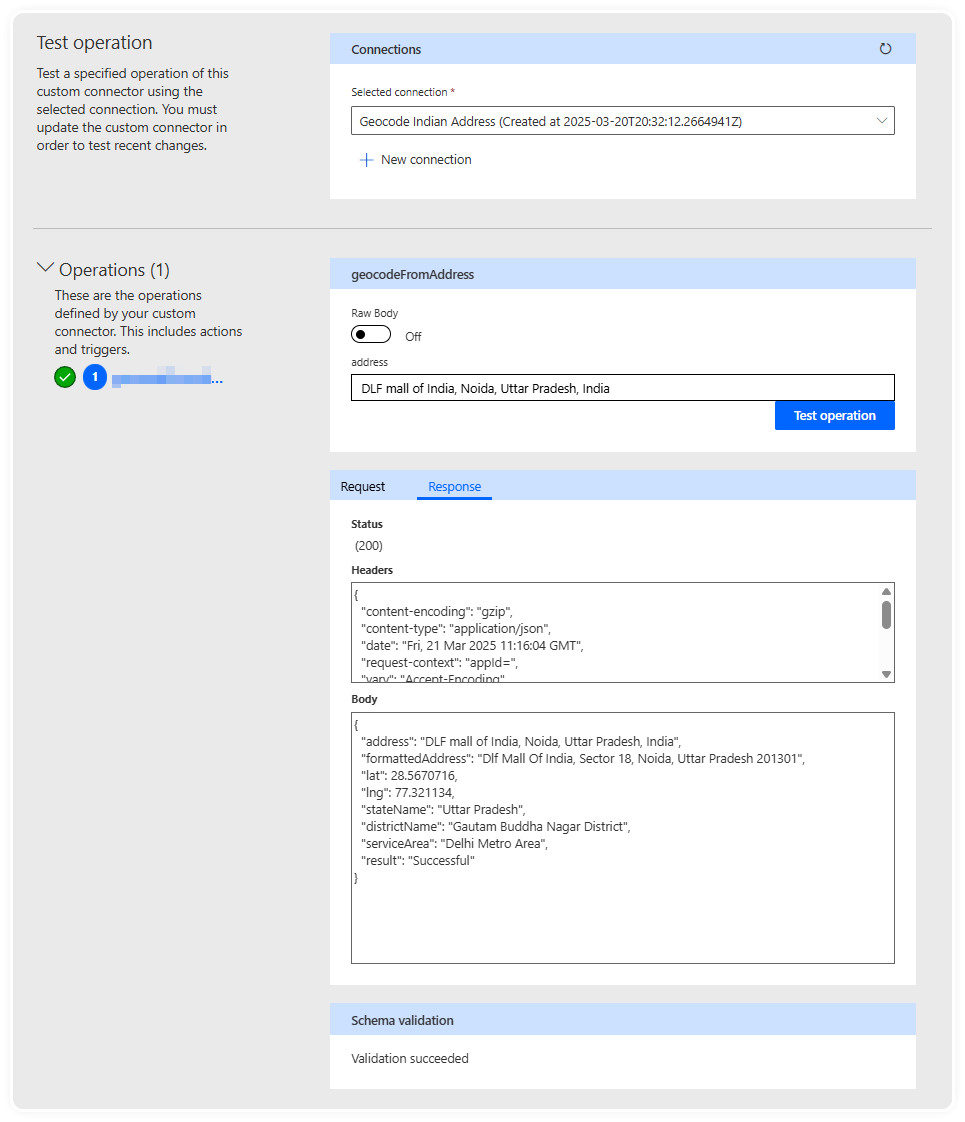
Testing
Using it in Power Automate
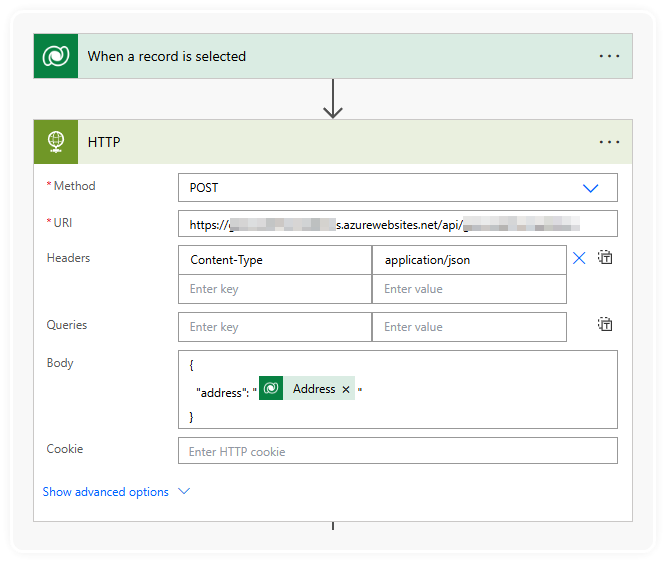
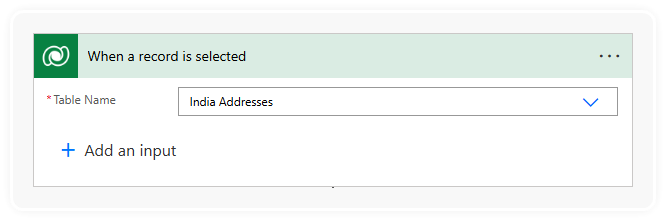
I started with a When a record is selected trigger from the Dataverse connector. And picked my test table.
Then clicking on the plus below to add a new action, and heading over to the Custom tab. Look at that! I'm famous!
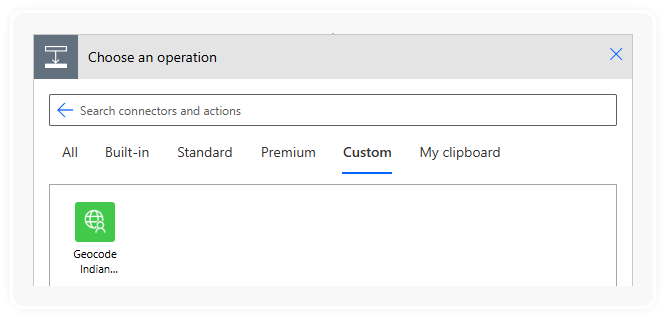
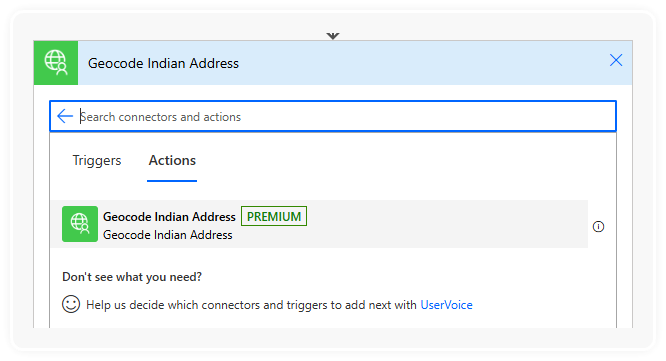
Selecting the Custom Connector shows the available actions, there's only one, but still, you simply wouldn't understand the excitement relief I felt when it showed up.
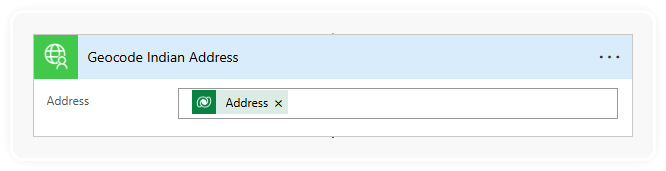
It just needs an address to be passed to it, so I picked the 'Address' column from table that the trigger is based on.
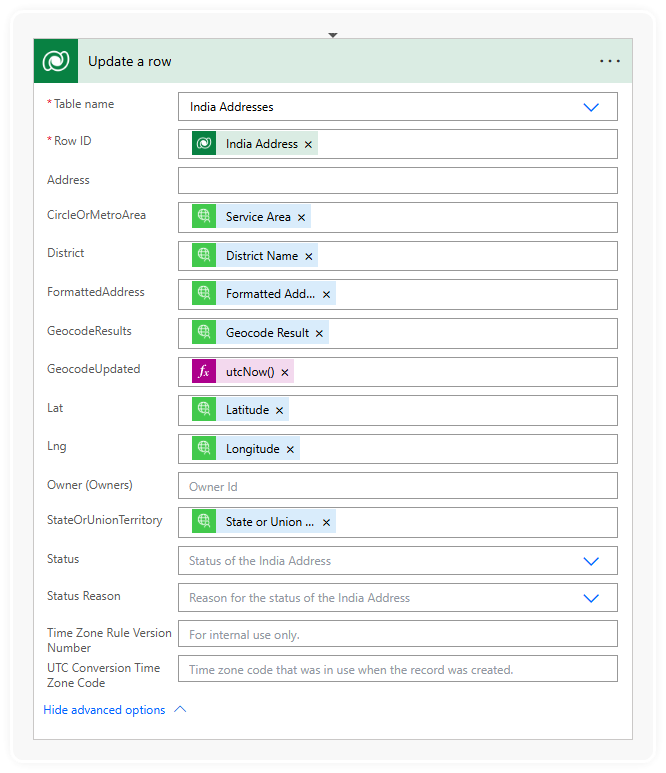
In this example I just want to update the record this Flow was run on, so I stick in a Update a row action from the Dataverse connector.
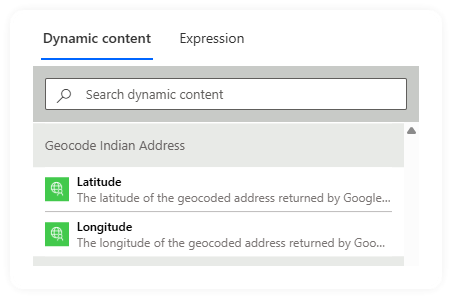
And look at all this lovely 'Dynamic content' to choose from, so much better than typing things into the fiddly small Expression box.
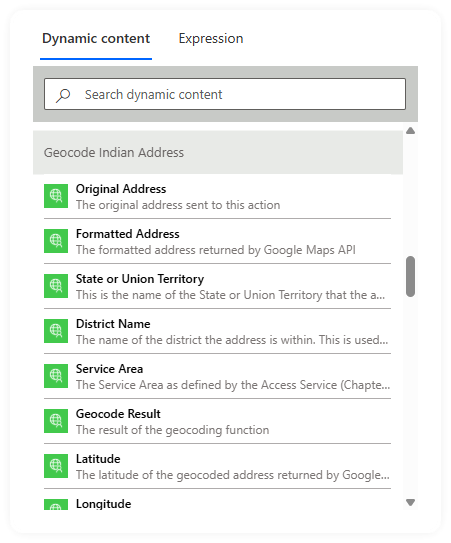
Also a nice touch is that when you're picking a value to use for a number column on the table, the Dynamic Content only shows items with matching data types.
So we end up with this.
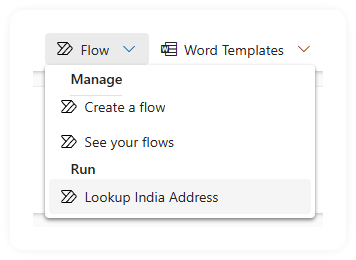
And after I ran it on a record, using the Flow menu at the top (again, it doesn't have to be manually triggered, in production it will likely be set to trigger when a record is created or updated).
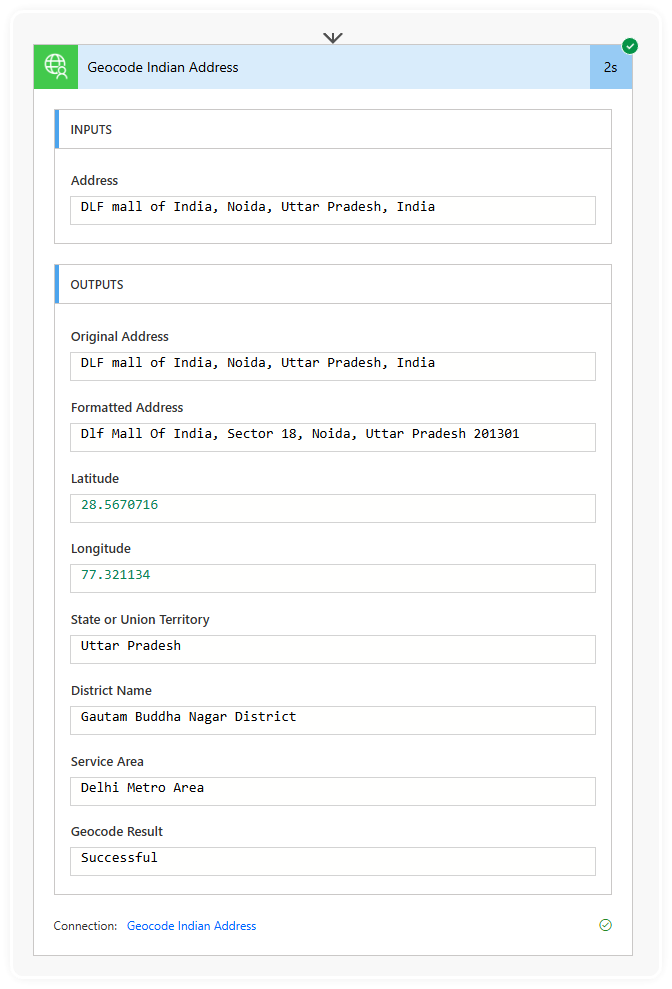
I already know it worked because I refreshed the page, but for the curious here's a screenshot of me checking the flow run to see exactly what it did.
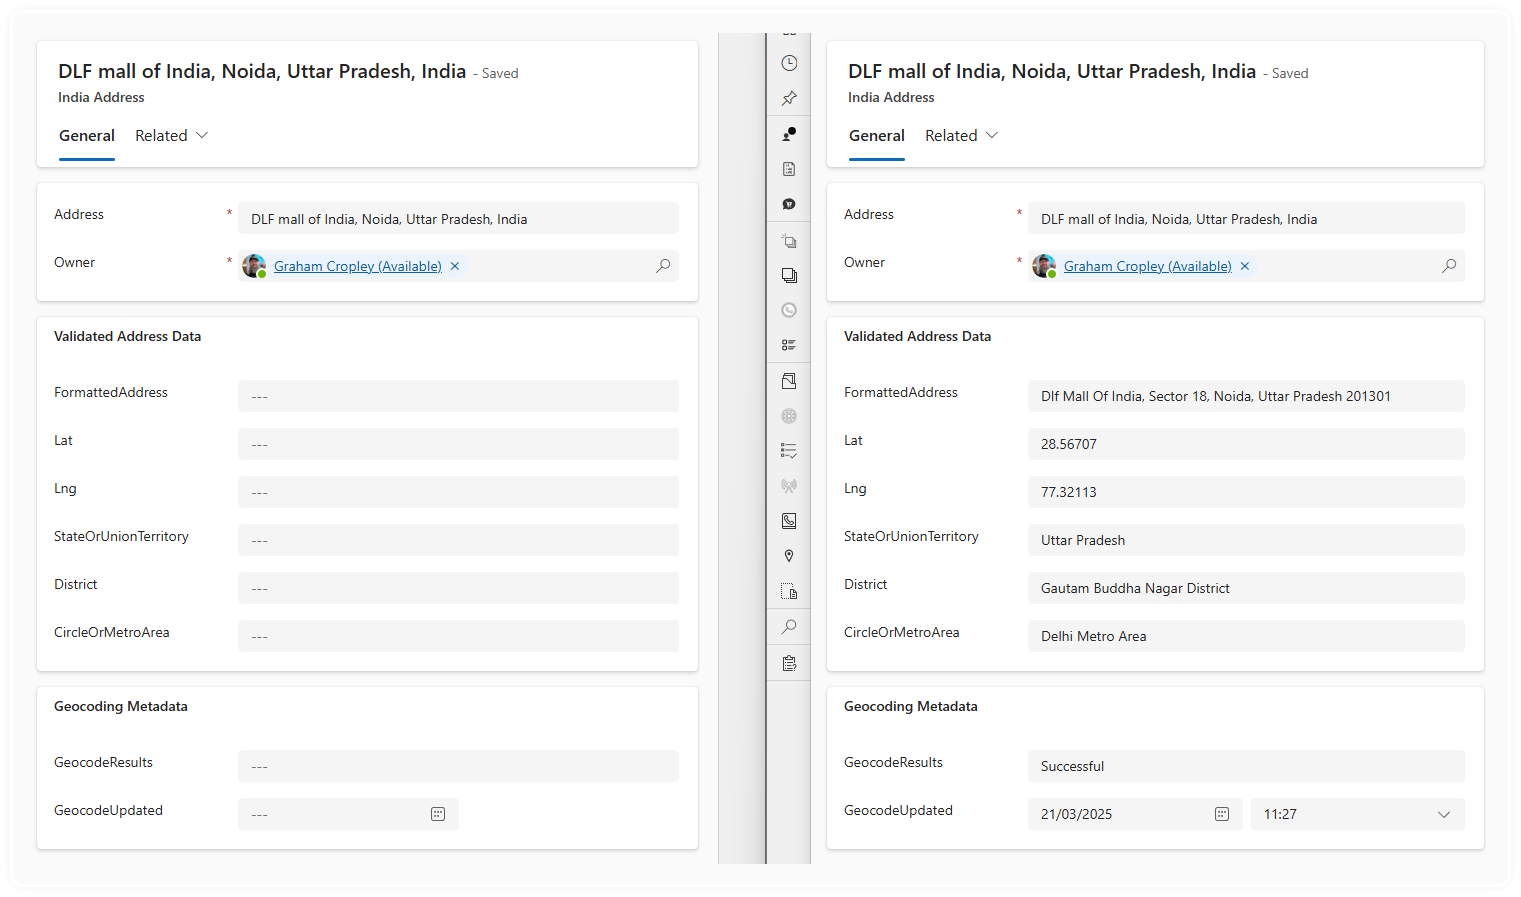
And here's a before and after shot of the record in Dynamics 365.
Is that it?
No, of course not. Lookups and data is all well and good, but you've got to do something with it.
So what are we really after here? What were we trying to solve at the start of this?
The question was about planning expansion and licenced coverage in India based on pipeline or other available address-based data.
Are you thinking what I'm thinking? Yes - Visuals!
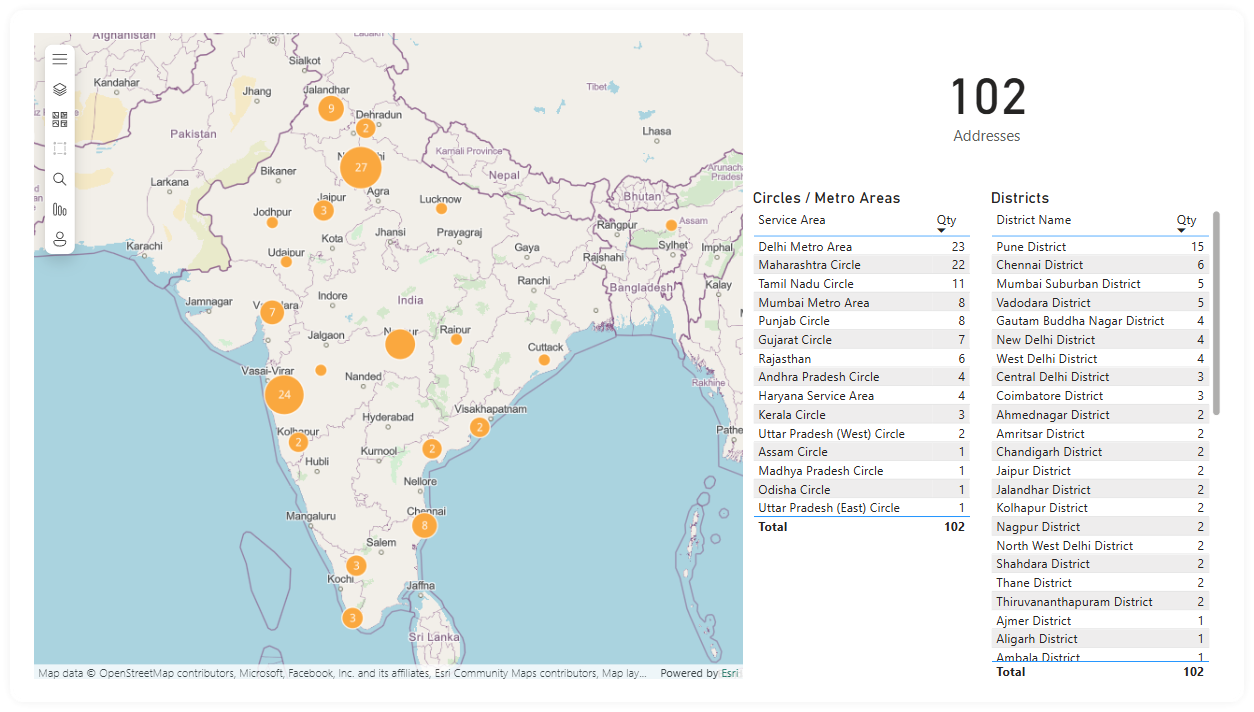
With the geocoded latitude and longitude (or even just the addresses really) we can also plot on a map to show the location and concentration of addresses which makes is very easy to see the placement and distribution of all these addresses.
ArcGIS for Power BI has some lovely features that I've not fully explored but seems capable of plotting markers as well as drawing boundaries and more.
The next most obvious thing to show would be a list of distinct Service Areas split into the two categories ordered by quantity of addresses. So we can show the most popular Telecom Circles and Metro Areas for Access Services, and the most popular Districts for the Access Service Category B services.
Here's a sample set of data built from some of all of McDonalds addresses in India.
As you can imagine this still isn't the end of it, there's so much more I can do to implement weighting based on customer profile, opportunity stage, or employee count, and much much much much more to inform strategic business decisions with beautiful and credible accurate data.